
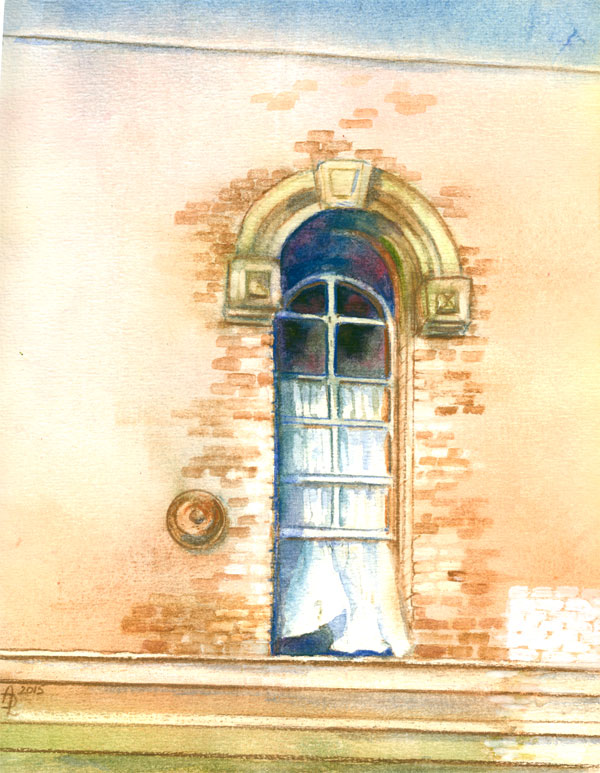
A New Coat of Paint
8 x 10 inches on 140 lb watercolour paper, using various watercolour brands,
some watercolour pencils, and a bit of acrylic paint. Reference is my photo.
On the
heels of my previous piece, Grackle-attitude, I wanted to continue to
explore uses of wax coloured pencils with other media. I decided I
wanted to do a watercolour piece that had architectural elements
needing straight lines. I picked an old photo of a historic
Nashville building, that was going under renovation. The window that
was my focus was an old double hung sashing.....it was open both from
the top and bottom allowing a breeze to flow thru.
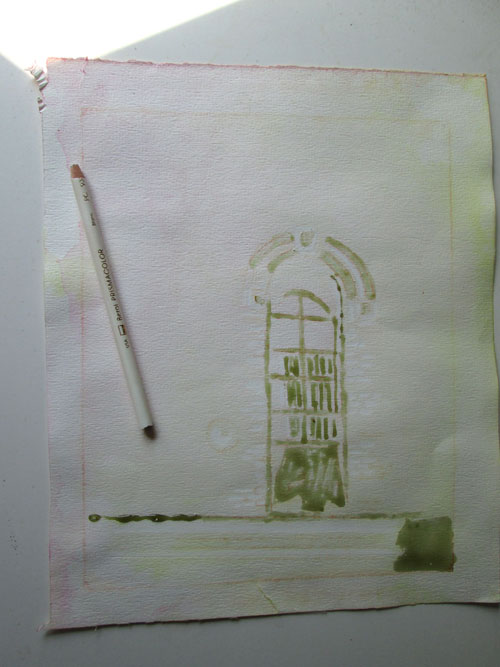
I
sketched out the window and laid in lines and curves of the window
and curtain with liquid misket....showing here as a greenish grey. In
addition I lined off some of the straight lines and bricks with a
white wax coloured pencil. If you look closely you can see the bricks
embossed with the white coloured pencil.
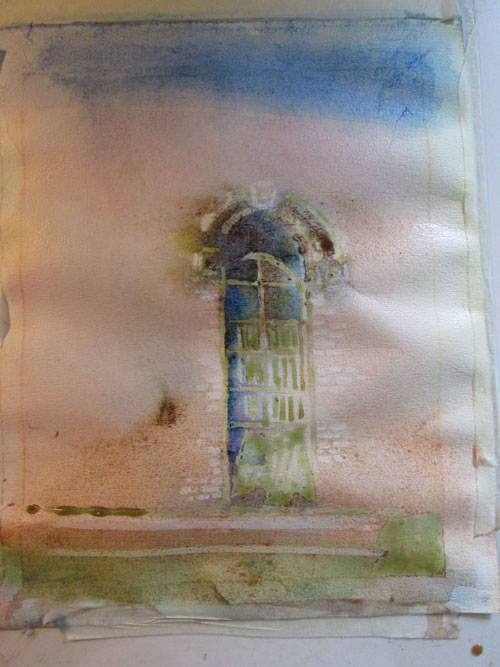
I wet
the paper and slapped it onto plexi glass, and taped it all down
after applying my first washes. You can easily see where the white
wax coloured pencil resisted the watercolour wash on the bricks, in
addition to where the liquid misket was located.
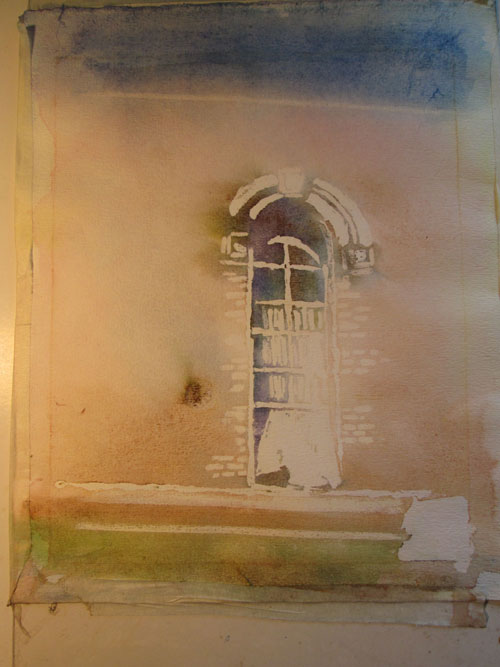
After a
couple of more watercolour washes, I removed the liquid misket and
lightly erased on the colored pencil bricks to remove puddled dried
watercolour. Now I could see where I needed to go next to firm up
the window and surrounding wall. I was especially pleased with the
top portion of the window, showing the upper arch's depth. I had
done a line of the wax white coloured pencil just under the frame,
that got covered with my wash. I later was able to gently lift that
watercolour residue off the white pencil line. It made it look half
in and half out of shadow.
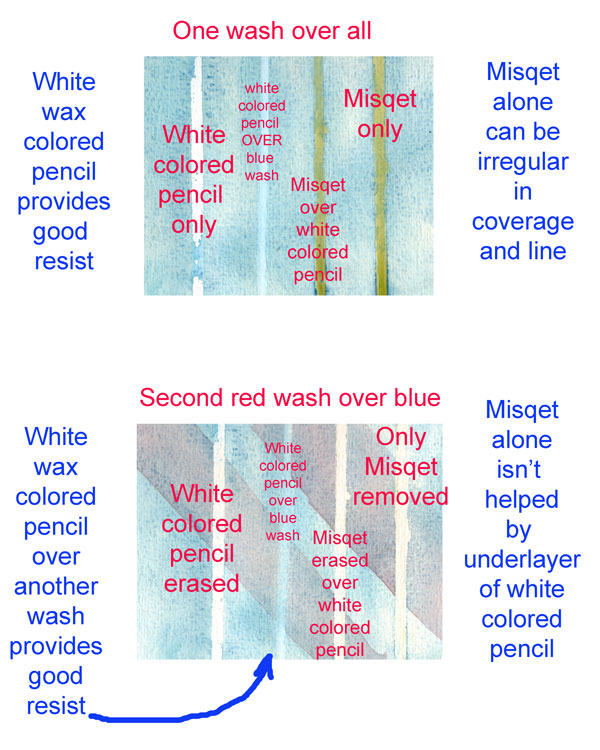
Before I
finished the watercolour study, I took a waste piece of watercolor
paper, and drew four lines. The first one was a white wax coloured
pencil line. Next I left blank. Then I drew a white wax coloured
pencil line and I put a bead of liquid misket on top of that. Then
finally I drew a line of misket only. I did a light wash of blue
over all four lines. When dry, in the blank space I'd left, I drew a
line of wax coloured pencil over the blue wash.
After
that I lightly brushed a second red watercolour wash diagonally
across the paper and lines.When that dried, I erased the first
colored pencil line and it came off very clean. The next line over
wash I also erased, and again came off very nicely, showing the blue
wash underneath. I removed the last two misket lines, and found not a
lot of difference in the line. I think that the reserved white from
a wax coloured pencil line is most effective when I want that line
to remain white (or whatever color I've used). If I want to just
“reserve” the white to later apply watercolor over then misket
seems the best, tho' the line won't be as straight as the wax
coloured pencil. I also like the idea of using the wax colored
pencil OVER an already laid down watercolour wash. All these bits of info will play into my next watercolour project.
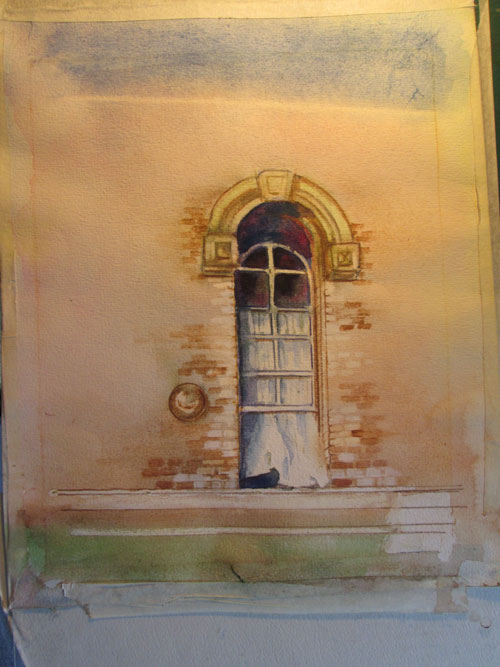
For the
finish of this piece, I added in additional “bricks” of various
hues around the picture's main focal point. I had reserved the white
paper for the new coat of paint on the lower right ledges, but felt
it needed something else to 'splain the title. I took a dab of white
acrylic paint and applied it over a regular square of bricks to
signify that the old distressed bricks were getting a new coat of
white paint.
I
enjoyed fooling around with the watercolour and the wax colored
pencil. It's yet another neat tool in my artistic toolbox.
I believe that John Singer Sargent used wax crayons as a resist in his watercolor painting "White Ships" 1908.
ReplyDeleteHi KandskisArt
DeleteWhat a neat art tibit! I had no idea. John Singer Sargent's watercolours are an ongoing inspiration. The glow he gets in the shadows of his buildings.....YUM! Thanks for stopping by.