Monday, November 10, 2014

If it don't work right the first time......do it again!

A while back I finished a knitting project.....a knitted lace sampler scarf.

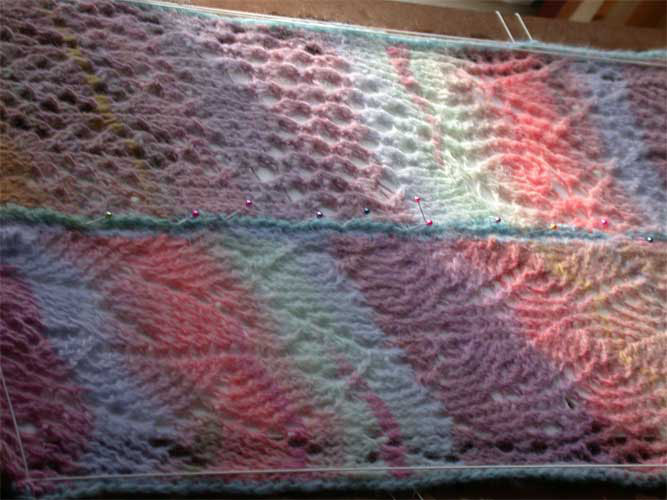
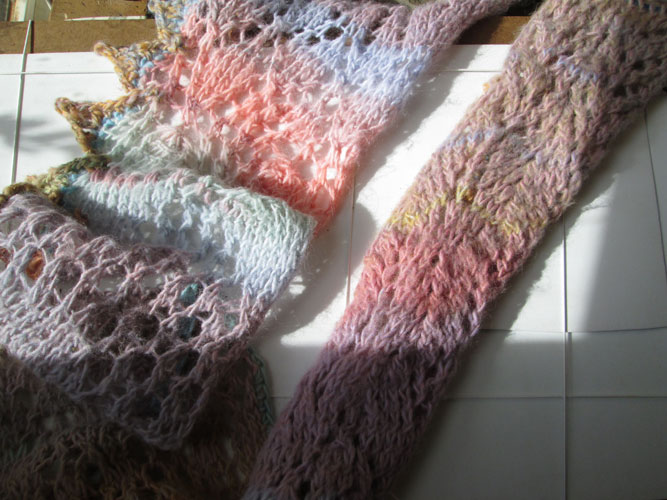
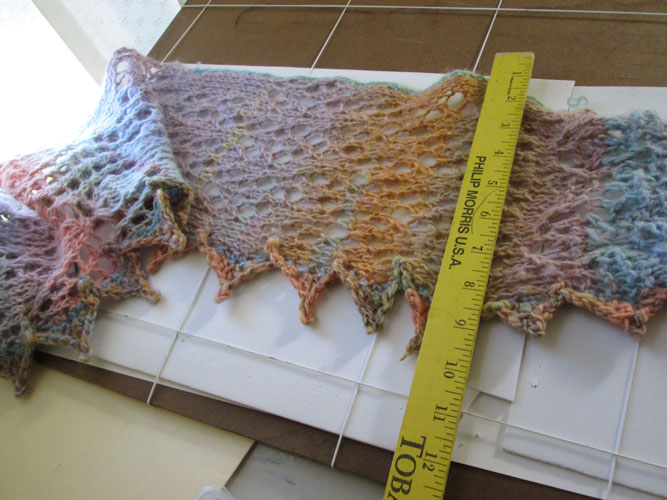
At the time I did what all good little knitters are supposed to do, I wet blocked the scarf and it looked pretty good. As I began to wear it, the selvages began to “roll under with wear”, as you can see from the right hand section of the scarf.

Grrr!......this hid all my hard work on knitting the fun lace patterns.....well, shoot!

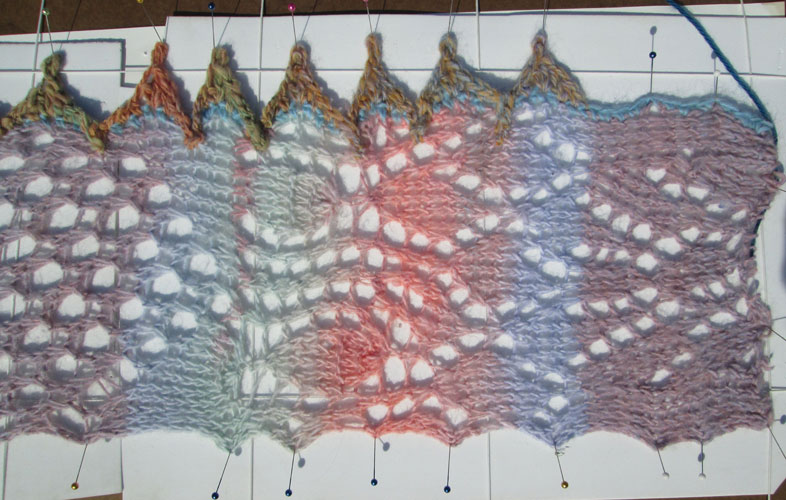
So recently I added onto one selvage a simple crocheted edging in a slightly heavier wool two ply. The scarf was from a LionBrand singles yarn. I began to wet block it for the second time.


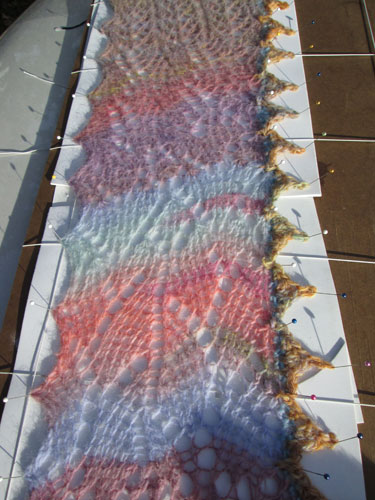
I found the longest piece of masonite I had and began to stretch and pin the loooooong scarf.......


After I finished the first half, I compared the re-blocked side with the single blocked side.....and found I'd gained 2 or 3 inches, just by re-blocking. Now lets see if the added border and re-blocking will work better, when I pull the ends together for an infinity scarf.


Monday, November 3, 2014

“Meet My Character” Blog Tour......The blog tour with character!


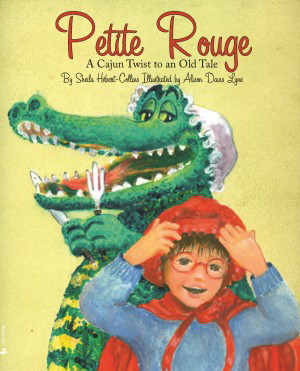
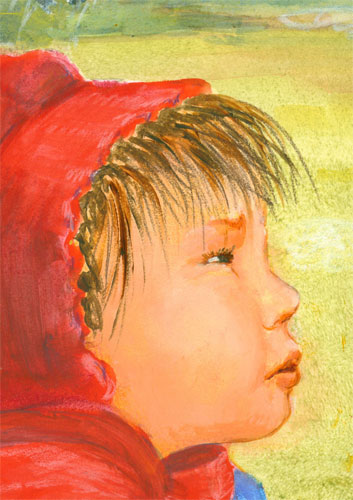
This is a post about character development in my most recent picture book, Petite Rouge: A Cajun Twist to an Old Tale, Pelican Publishing 2015.

I was tagged for this Blog Tour by the lovely and gracious Christine Mix. Check out her blog tour post, about her picture book character “Spike” at:

The first question in this installment of the “Meet My Character” blog tour:

What is the name of your character?
The character's name, Petite Rouge is French/Cajun for “Little Red”.....or Little Red Riding Hood. Tackling such an old fairy tale, that has been done so MANY times before, was a bit daunting.

When and where is the story set?
In Sheila Hebert-Collins' retelling, even tho' the woods was traded for a swamp (Cajun = Louisiana = swamps) and the wolf traded for a gator and the time is “today”.....the basic story was about the same.


What should we know about her?
Each time I'd read the story, I was struck by the same thing; Little Red Riding Hood, a perfectly “normal” looking little girl, ALWAYS failed to 1) recognize that the wolf in the woods was the one her mama had warned her about and 2) realize that the “grandmama” in the bed, was NOT her grandmama......and I'm going “Wait....what???”
I know the point is to get the little reader to start saying.....”Watch out Little Red Riding Hood”.....and “know” something that the main character doesn't seem to pick up on.....but seriously???
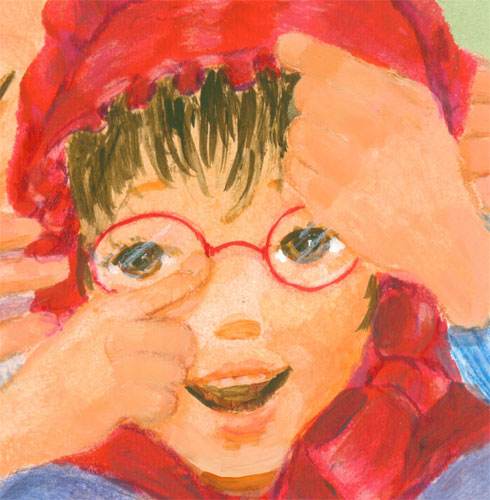
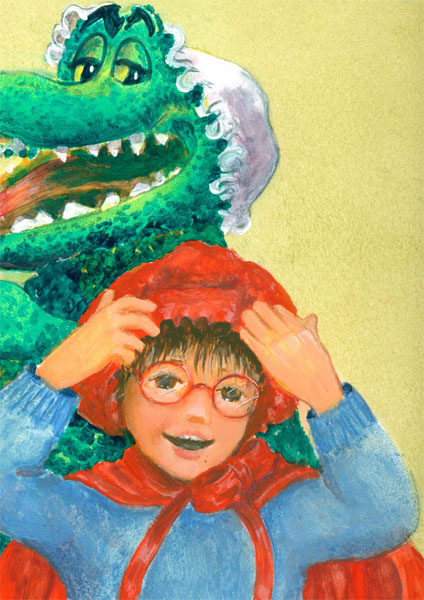
So in my version, I gave an explanation that makes sense to me. Little Red Riding Hood or Petite Rouge is near sighted, and wears glasses. The villain steals her glasses rendering her incapable of seeing that he had taken her grandmama's or grandmere's place.
Now this was something I could work with.

What challenges did you have in telling the story?
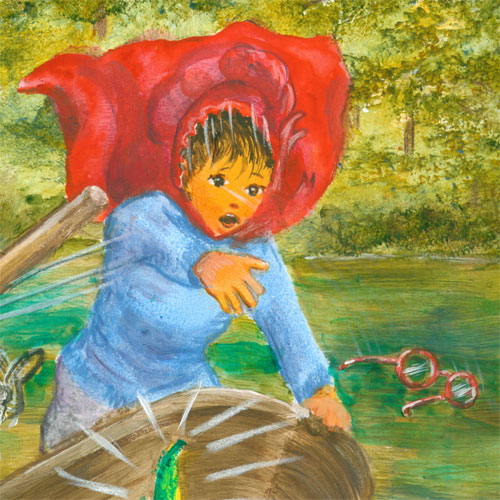
Shelia Hebert-Collins gave me a wealth of scenes and dialog to work with in telling Petite Rouge's story. But to add in my bit-o-verve in the story, I picked up on one line that told of Petite Rouge taking a small boat thru the swamp to get to her grandmere's house. During that boat ride, the evil gator BUMPS the boat and knocks Petite Rouge's red glasses off her nose.......


and into the swamp....where he swallows them down.......


rendering her only able to squint to try and see who she is really talking to.

What goals did you set for yourself in telling this story?
My main task was to tell the story as written by Shelia Hebert-Collins adding my own bits of (color) spice to the mix. One of the first things I found I could use was the actual color play of the RED cloak and hood ( garde-soliel or sun bonnet) that Petite Rouge always wears, against the intense GREEN of the evil gator.


I intentionally lowered the chroma (color intensity) of the background swamp/house interiors to allow the eye to go directly to the very very RED of Petite Rouge's clothing and the virulent evil GREEN (Phthalo green glaze over a arylide yellow underpainting )of the wicked gator. Secondly I found that I could emphasize the fact that Petite Rouge wore glasses by making them red. I had both her mother and grand mother also wearing red glasses, since near sightedness often runs in even fictional families.

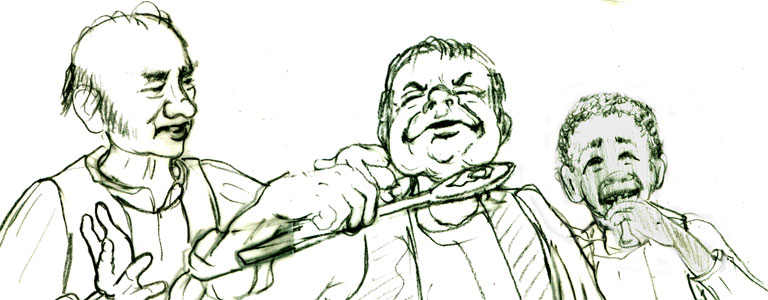
I also had a blast working with a few of the secondary characters. These secondary characters....... 


had been in a sketch done years ago, and found their way into the book. They are pivotal at the end of the story where they........oops! No spoilers! You'll just have to get the book to see how Petite Rouge gets on.

And now onto the next in line for the Meet My Character Blog Tour here......
my Midsouth SCBWI friend, the totally: “Fabulous Illustrator” Mary Uhles:


Mary Reaves Uhles has created illustrations for clients such as Cricket Magazine Group, McGraw Hill, Magic Wagon Press, and Thomas Nelson. She is currently working on THE LITTLE KIDS TABLE, a picture book for Sleeping Bear Press, available in the Fall of 2015. Previously she illustrated BEYOND THE GRAVE, a chapter book in the Up2U Adventure series from ABDO Publishing. She has twice been awarded the Grand Prize for Illustration from the SCBWI Midsouth Conference. Her piece, Eat, was a finalist in the 2014 SCBWI Bologna Book Fair. Prior to beginning her career as a freelance illustrator, Mary worked as an animator on projects for Warner Brothers and Fisher-Price Interactive. A PAL member of the Society of Children's Book Writers and Illustrators, Mary lives with her family in Nashville, Tennessee. Since creating characters and stories is her favorite thing in the world (even more than mocha fudge ice cream) she feels mighty lucky to do it every day in her hilltop studio.


Friday, October 3, 2014

Ladybugs: 3 , Brown Thrasher: 0


Ladybugs: 3 , Brown Thrasher: 0

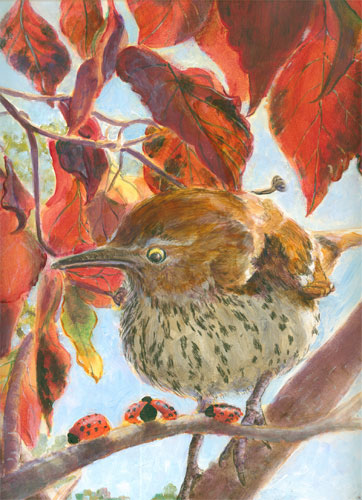
This blog post is a “finally finished” post for “Ladybugs: 3, Brown Thrasher:0.” It is done in acrylic paints, with a bit-o-colored pencils thrown in. It measures 11x 14 inches

I started this painting with a couple of goals in mind.....I wanted to “mix my media” and techniques....using both acrylic paints and colored pencils. I also combined opaque and glazing painting techniques.

Plus I wanted to tell an itty bitty story......a bemused bird (brown thrasher) gently taunted by three ladybugs, who knew they were safe. 'Cause the brown thrasher wouldn't eat them since they taste so bad.

Besides I really liked the photo that Frank had taken of the backlit brown thrasher. And it worked beautifully with the photo I took of the backlit fall leaves. The ladybugs were drawn from (un-fond) memories of being dive bombed last spring by some of their tribe. The only way I could get them to stop was to promise to include them in a future painting. Well.....promise kept!

Enjoy!

Tuesday, September 30, 2014

Colored Pencil Brown Thrasher in an Acrylic Painting or Mixing My Media, Again


This blog post is a bit about an experiment I'm doing involving mixing techniques and media. In my current painting, “Ladybugs:3, Thrasher:0” I have used both differing painting techniques, (opaque painting and glazed painting) and mixed media,(acrylic paints and waxed based pencils). I talked a bit about the different painting techniques I used in past posts, and now I'm “show and telling” about mixing colored pencils with acrylic paints. I don't have any evidence of the archival-ness of this mixing of media, but I think it should work OK. I used wax based pencils in between two coats of acrylic glazes and will follow that up with a top coat of acrylic medium/varnish when finished. That should hold it to the canvas just as the paint pigments are bound to the canvas by the acrylic medium.

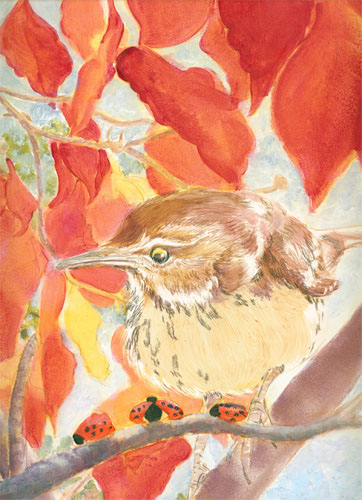
The image above shows the brown thrasher sketched in with very thin acrylic glazes in brownish red and buffy......the “native” colors of the bird. I'm painting on a prepared very smooth gessoed piece of masonite. Light acrylic glazes (acrylic fluid paints mixed with an acrylic glazing medium) dry pretty quickly and keep their “tooth”. If acrylic paints are applied without a glazing medium or applied thickly, when they dry will assume a plastic texture and wax colored pencils won't adhere to that surface.


I drew in the individual feathers on the upper body of the bird, along with detailing the staring “stink eye” he's giving the ladybugs. (“Stink eye” is appropriate as ladybugs stink to high heaven when squashed.....something the thrasher seems to know!)


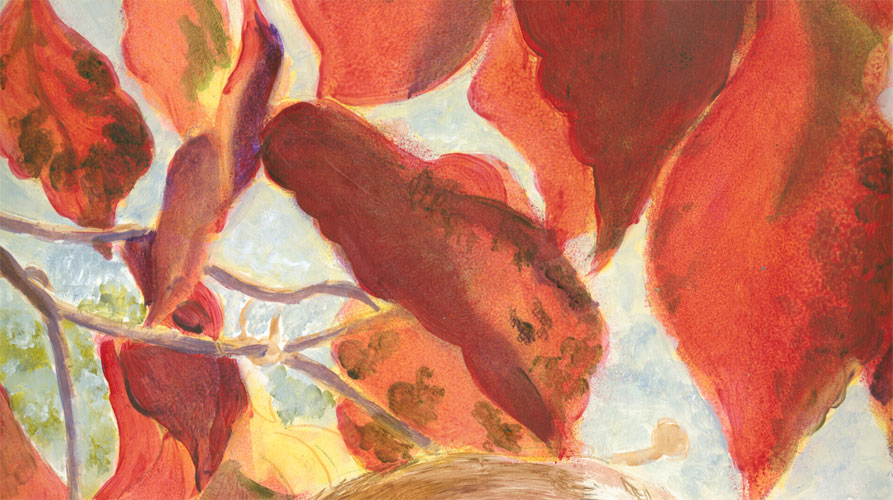
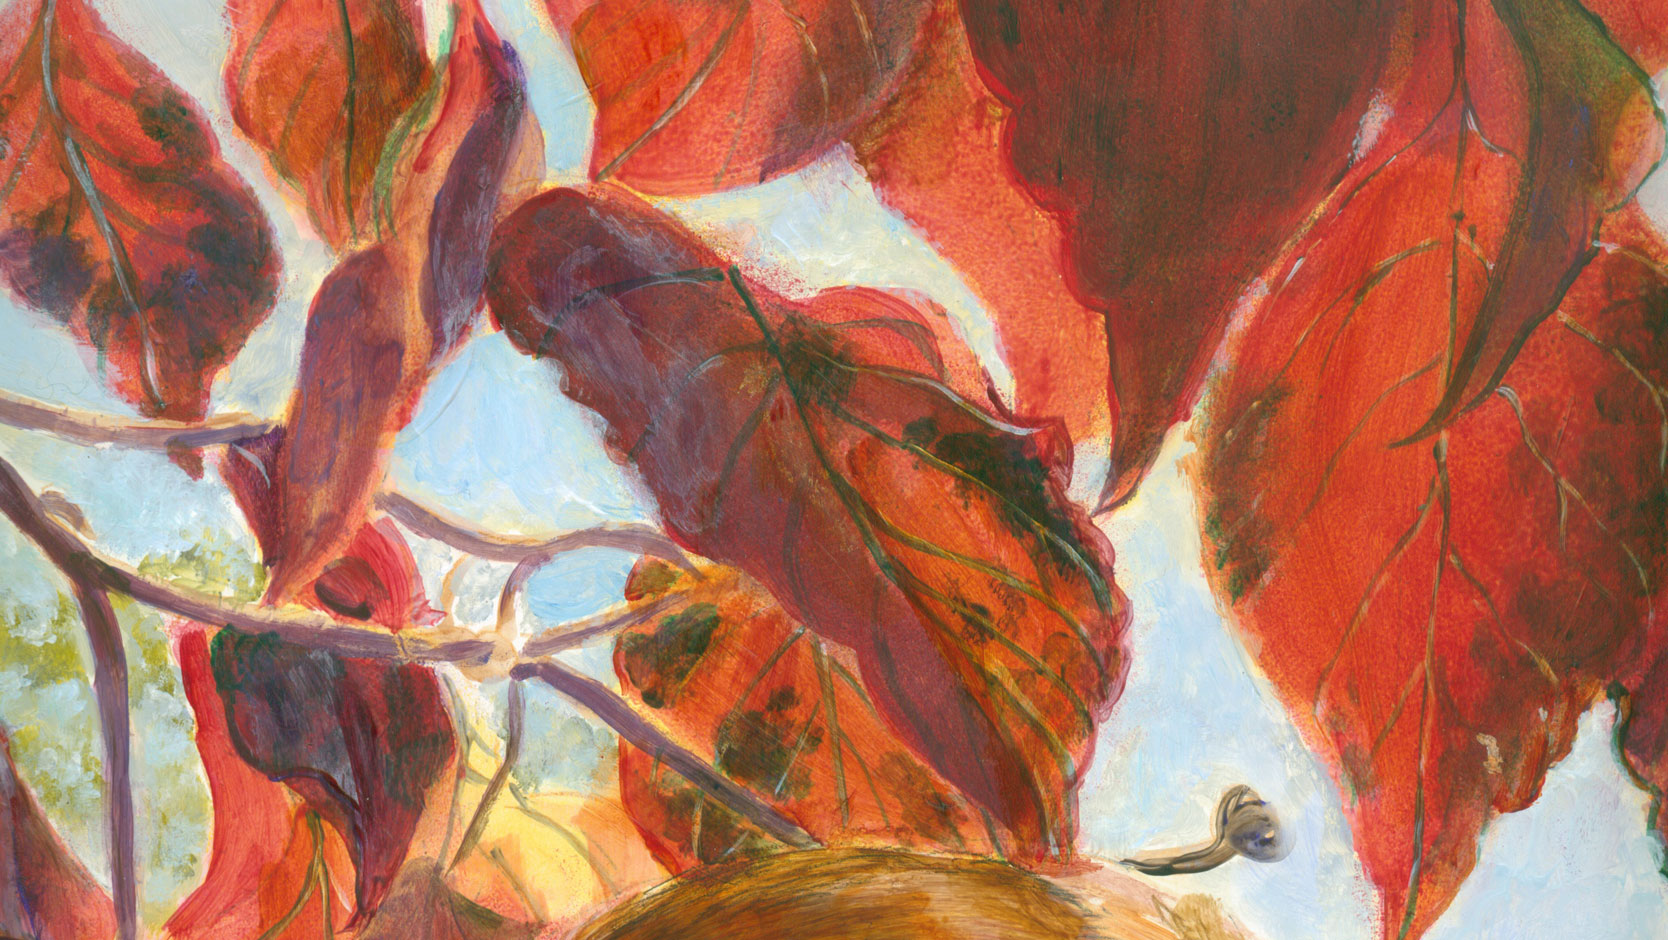
At the same time you can see that the glazing of the backlit dogwood leaves is progressing.


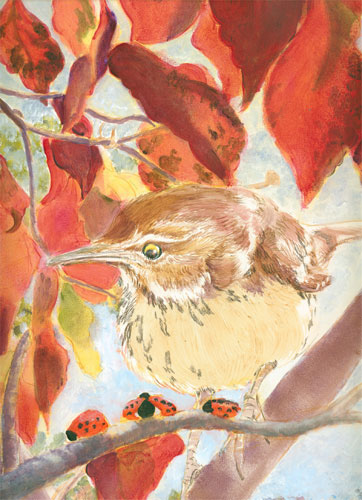
Since I wanted to judge how dark to glaze the surrounding leaves, I darkened the thrasher's buffy front and underbelly, with a glaze of transparent brown and cobalt blue. After that dried I drew, with a sepia wax colored pencil, the individual brown stippling on the bird's belly. I covered that with another light blue glaze and checked the effect of the glazed “shadow”.


Now I just have to tweak details, and I will show the finished piece next time.


Monday, September 22, 2014

Drunk on Color; Part Deux

Drunk on Color, part Deux

This blog post is a continuation of my “ode to colour” for the painting in progress, “Lady Bugs:3, Thrasher; 0”

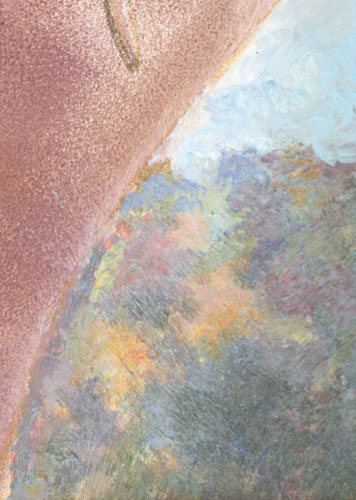
Last time I wrote about the joys of painting colorful foliage in the far background. I painted this foliage in opaque colors, using a progression of hues from light to dark values. This kind of painting has a unique charm all it's own. It is direct, in other words “WYSIWYG” (What You See Is What You Get) and yet the progression of values of the colors is planned.

In this next segment of the painting, I switched to my current favorite painting style, acrylic glazes. This style of painting is similar to Photoshop layers of colour, with the medium an acrylic glazing medium rather than the layers in the computer program. This takes multiple layers painted separately and dried, before the next layer is applied. This avoids muddying of colors that can sometimes happen when painting opaquely.

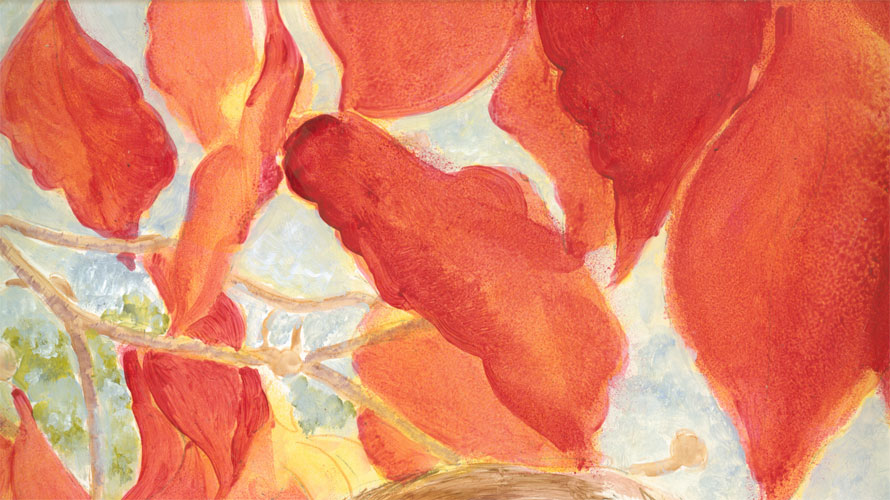
This is the mid ground section composed of fall dogwood leaves, backlit in morning sunlight.  


A layer of hansa yellow and quinacridone crimson have been applied. The fluid acrylic paint has been mixed with an acrylic glazing liquid that thins it without diluting the color load of the pigment. The finish of the paint film has a slight “tooth” and is not rubbery, like normal “full bodied” acrylic paints.

I laid in more layers of the crimson, with additional hints of yellow and green:


And finally I laid in a third layer of colours, including some purples (mixtures of crimson and cobalt blue) and greens. I laid in some detailing of leaf veining, and leaf outlines.....but didn't want too much detailing to derail the middle ground illusion.


I usually try to paint “locally” i.e. concentrate on individual portions of a painting, but try to remain aware of the “global” aspect of the painting.....i.e. How each segment relates to the whole “illusion of reality “of my paining.

It's been fun to use two different styles of painting, opaque and glazed, in the same painting. They do two different jobs, background and mid ground quite well. Next time I'm pulling things altogether with the focal point.


Tuesday, September 16, 2014

That's MY Parking Space! or One Way I Mix my Media

That's MY Parking Space

This post is about one way I mix my media.
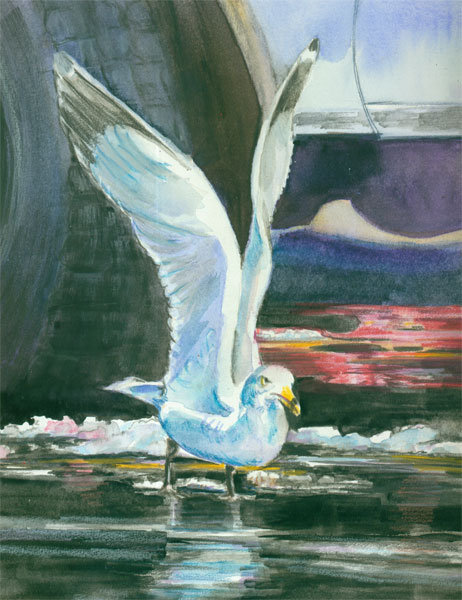
“That's MY Parking Space!” Is painted from yet another one of Frank's wonderful photos. This one was shot in a parking lot of landlocked Russellville, KY.
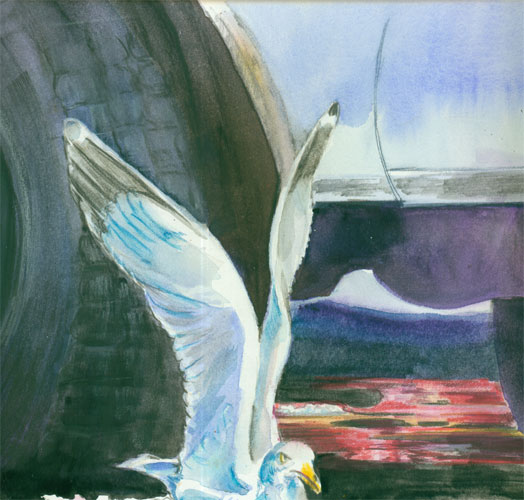
It's painted with a mix of traditional tube watercolor, along with watercolor pencils and Prisma wax colored pencils. It measures 10 x 13 inches on watercolor board.

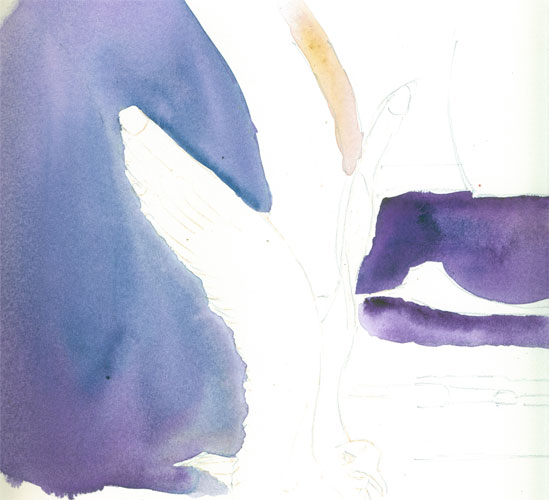
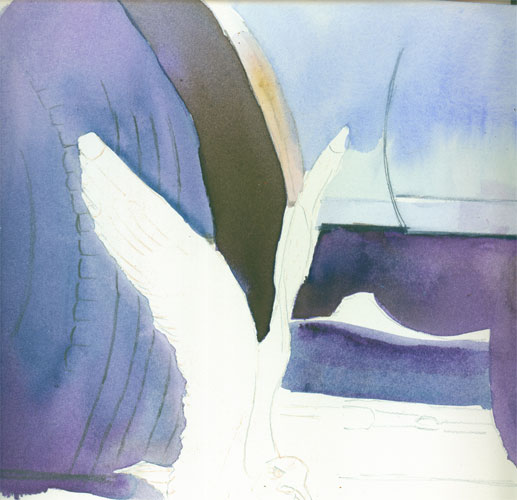
I started with watercolor washes, using a mix of indigo, and purple for the underpainting of the tire and some pavement. I carefully “outlined” the gull's wings with my initial wetting of the dark spaces I wanted to fill. A lot of time this is all you need to reserve watercolor whites.


I followed this first wash up with some general outlining of details with a dark grey watercolor pencil, so's the line could be “washed away” with my next watercolor layer. I then laid in the pale blue for the car door. After that I laid in the deep shadow of the wheel well, using a complementary brown umber. (Umber is basically a realllllly dark yellow, which is opposite on the colour wheel of the color purple.....equals a dulling, greying of the shadow without using black.


After that I worked on the gull itself. I'd left a good portion of the gull with just the white of the paper. But I choose to “outline” the left edge of the gulls feathers with a white Prismacolor wax pencil. The wax in the colored pencil can act as a “resist” to the watercolor wash. I also outlined the white outline in a black watercolor pencil to which I then added a bit of water to “pull” the black back out into the tire form. This let me safely refine the white feathers against the black of the tire. I learned this trick from Paint Radiant Realism by Sueellen Ross. She has a lot of cool tips to mix your media.


I went on to model the gull with light cool blues, using colored pencils to define some of the wing forms. I finished off the tire with lightened tire tracks in Prismas. I laid in the background reflected reds with more colored pencils, so's I could have total control of where the color went. I finally used a “Peach Black” from Holbein that I've found to be very nice for a true black that isn't too harsh. In most nature paintings I never use black, preferring instead to use combination of washes to get a more “natural” looking dark color. But in this case, since I was painting asphalt.....I went with a “un-natural” black.

And this is the finished painting:


Tuesday, September 2, 2014

Drunk on Color


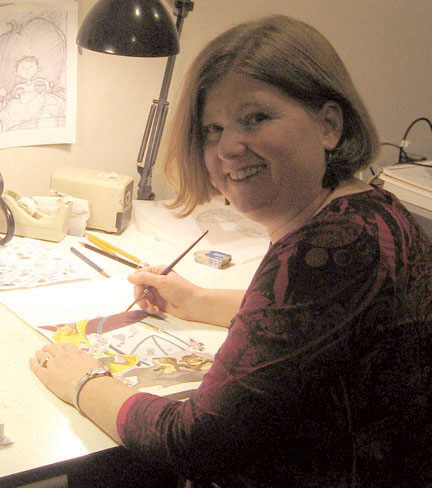
OK.....my name is Alison and I admit it.....I'm a Color-oholic. There I've said it!

My story is, I recently got a bit-o-time in between projects....and I decided to try some color experimentations with a current painting. The design called for some far away foliage in the lower background.
I had long had in the back of my mind a color explanation/experiment I'd seen in a book  ages ago. I dug out the book from my stash, and based on the points I'd read I tried this:

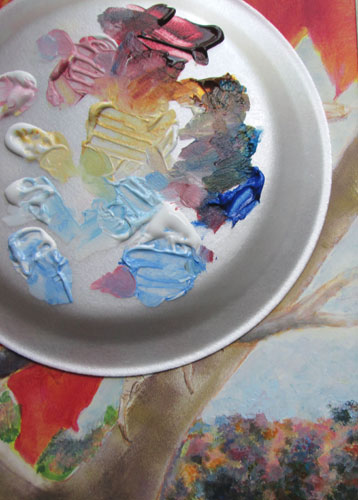
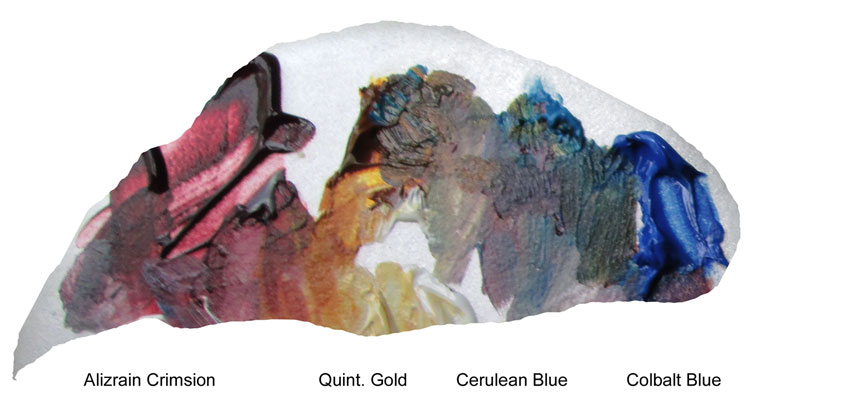
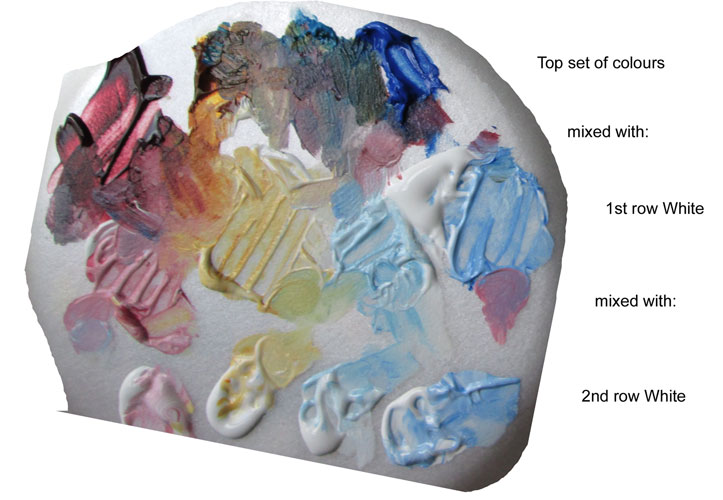
I squeezed out a bit of alizarin crimson, cobalt blue, cerulean and quinacridone gold.....i.e. A cool red, medium blue, greenish blue and a yellow. I then squeezed out a bit of white for all four colours, and mixed the colors with the white.


Then I did it one more time. The article I was working with said to do it for five piles of colour, but since I am working with fast drying acrylics in this case, instead of oils.....I stuck to the abridged version.

After I had my colours set out.....and in the beginning they were in nice organized piles! I proceeded to play. And the first thing out I found I needed a green for bits of the far away foliage. So's I immediately pulled together the cerulean blue piles and the gold piles.....and viola I had a green.


Then I needed a purple, and mixing the alizarin with both the blues gave me both a dullish violet (alizrain +cerulean = dullish violet 'cause the cerulean leans towards green which means it's automatically got a bit of yellow in its composition. And we all know yellow is the complimentary of violet which equals instant greying of the violet's intensity).....and a vivid violet (alizarin + cobalt = vivid violet 'cause cobalt and alizarin both lean towards the purple side of the spectrum and no yellow or warm color involved so no complimentary dulling)

After a lotta messing around, I started painting with leetle dabs of paint here and there following my photo reference. And I thought I could stop doing this “pointillist” type painting in spots of color......but I found I couldn't just stop at one bit of color here......I had to smudge it, then I found I needed a bit of it's compliment just beside it.....and I couldn't stop!


But of course, since I'm typing this blog post.......I DID step away from the palette....I CAN stop with colours.....I can......Oh wait! Is that a tube of Phthalo Blue? I wonder what that would look like on........

To be continued..........