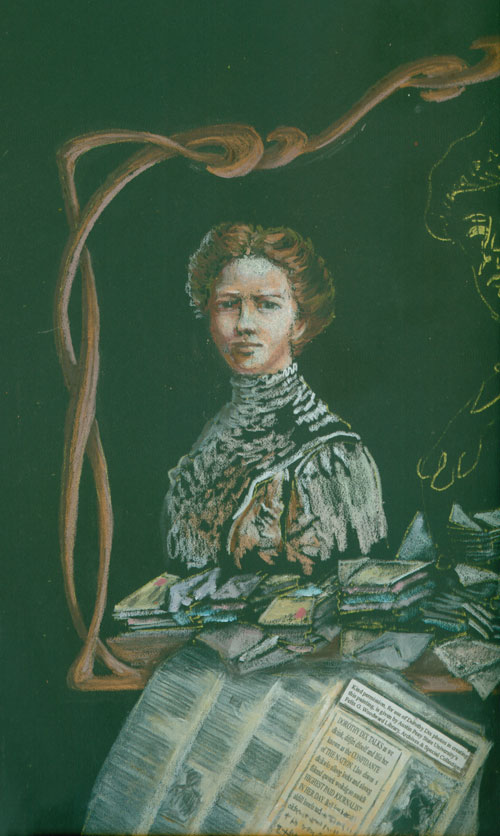
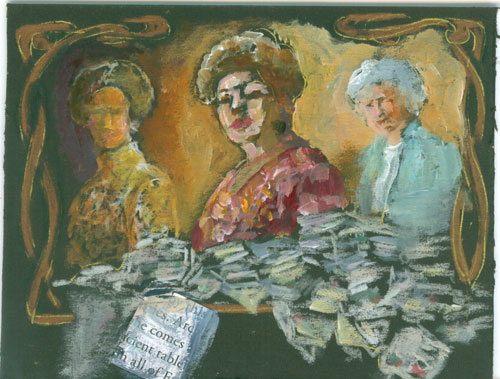
Saturday, May 27, 2017

Dorothy Dix Project

 
Portrait of Dorothy Dix (detail)
Mixed Media (Colored pencils both Prisma & Polys and acrylic paints with text on paper glued to the surface) on black illustration board
Portraits painted from Dorothy Dix photos used with kind permission, of Austin Peay State University’s Felix G. Woodward Library, Archives and Special Collections.

 
This week I'm starting out a new historical project....a portrait of “turn of the last century” advice columnist Dorothy Dix. After just a quick search I found that the lovely Austin Peay State University’s Felix G. Woodward Library, Archives and Special Collections had a ton of great photos of Ms. Dix..... aka Elizabeth Meriwether Gilmer. So I picked out a photo of her in her 30's, 50's and 80s, and decided to show her as her life and career 
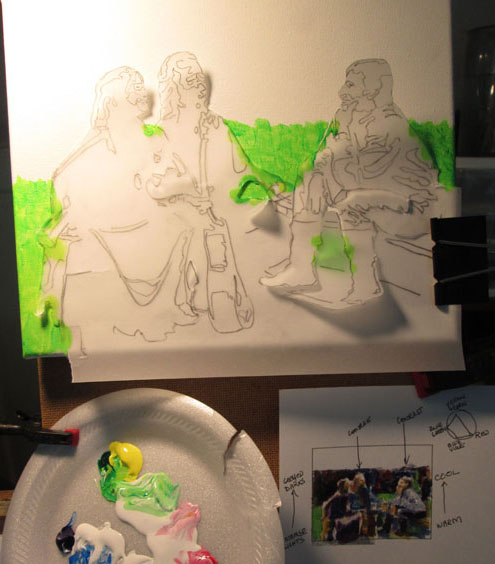
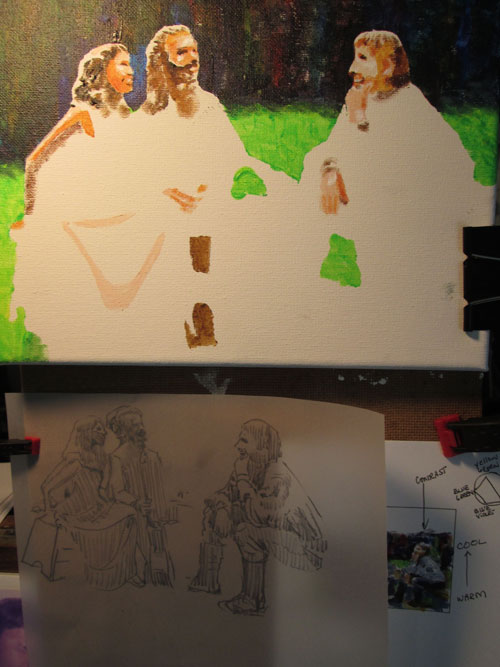
progressed. I did a quickie sketch combining the three views, along with a bunch of (snail mail) letters representing her fans' questions and a newspaper where her columns appeared.
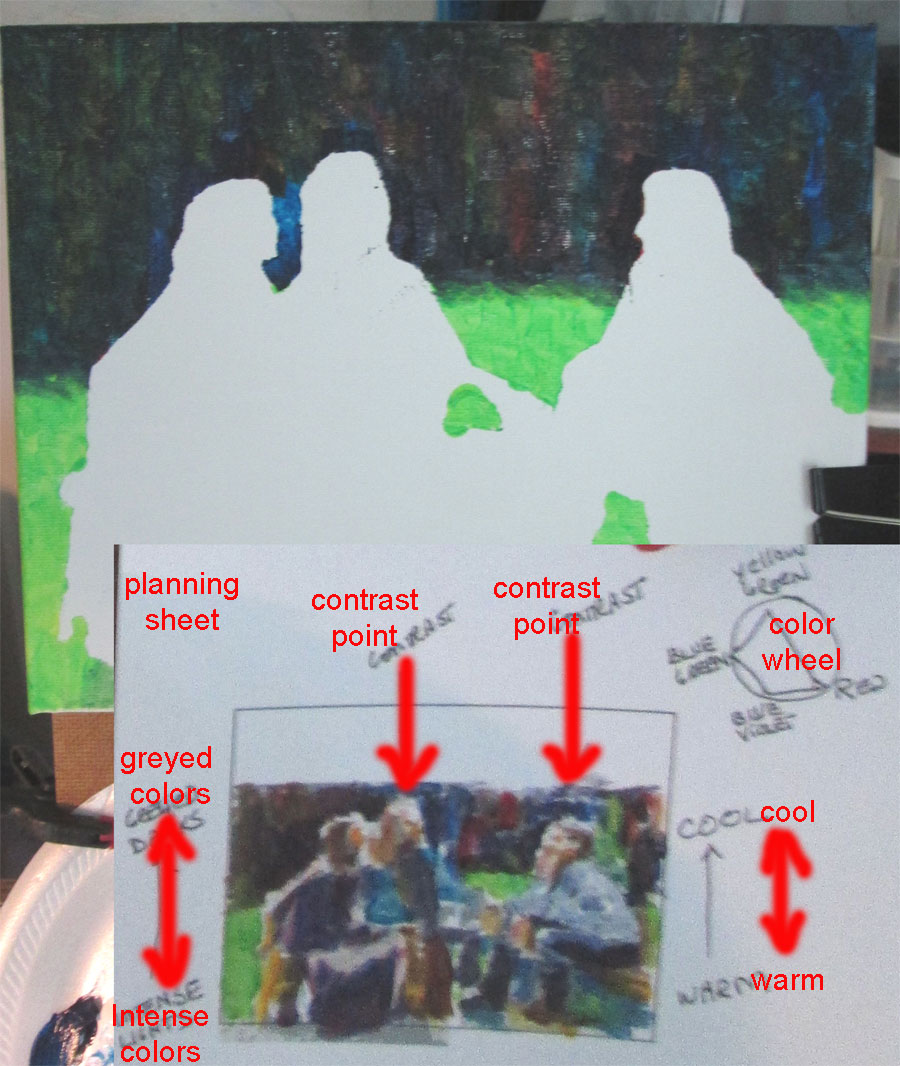
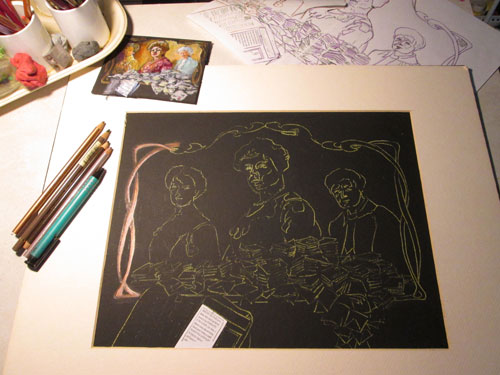
 
Using the colour thumbnail I made a pencil sketch and traced it off onto the black illustration board using yellow graphite paper. I started on the left with coloured pencils, drawing in the Art Nouveau border. 


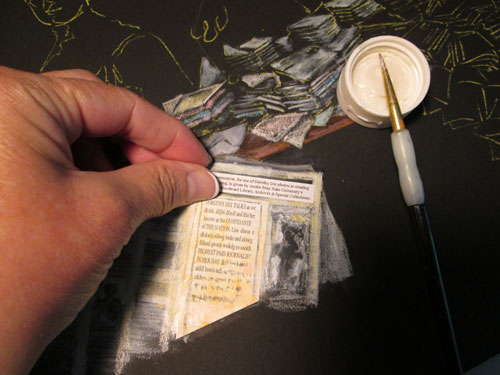
I then began penciling in the stacks of her readers' letters, resting on a shelf connected to the border. I took some random text with some headline phrases about Ms. Dix....”Confidante of the Nation”.....”highest paid journalist of her day”......printed them out on the computer, the size needed for the painting and glued them down onto a painted newspaper hanging off the shelf. I also included the permission from the Austin Peay Archives. After the adhesive (gel medium) dried I began glazing over the hand drawn text columns and pictures with white and yellow glazes to blend it all together. I wanted it legible but not blaring.
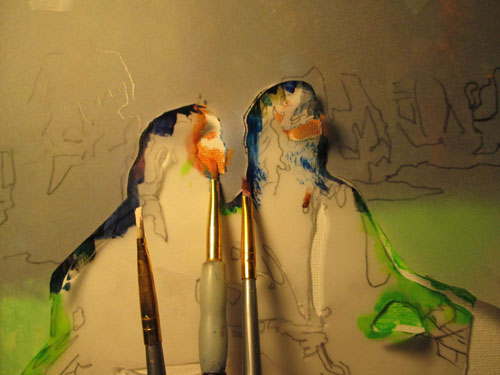

 
Then I was able to get down to the “fun” part......the first of the three Dorothy Dix portraits. I am doing the early and elderly portraits of Ms. Dix in colored pencil because I want them to recede a bit from the center and main portrait, and using colored pencils on the black illustration board will mute the colors a bit. For the center portrait, when she was in her hey day as a journalist, I will paint in full colour acrylics.


Friday, May 12, 2017

Singer

Singer
cherry
  This week I'm delighted to be sharing another guest blog by the talented sculptor, Frank Lyne.  He's introducing his latest sculpture.....Singer.


Upon finishing my last figurative carving, I meant to begin work on a cherry billet already in the shop. It didn't seem deep enough for what I had in mind, so I went back to the stable wood stack and selected a much bigger cherry billet. It was too big to move, so I decided to split it in half. It wouldn't split. After burying 4 wedges as deep as they would go, I stuck a 6 foot pry bar in the split and rocked it back and forth until at last a shell popped off, revealing why it wouldn't split. There was an internal knot that didn't show at all on the surface. Although the shell wasn't very deep, the knot looked interesting, so I took it to the shop to see what could be made from it.


It looked like it could be a bowl, so I made a cross cut above and below the knot, then another cut to flatten the side opposite what was already a bowl-like depression. This project looked like it was going to be more trouble than it was worth, so I turned my attention to one of the parts I had cut away from it. It was a slab big enough to make a full size face, but not deep enough for a whole head. It occurred to me that Olen Bryant, my sculpture teacher 50 years ago, would often make faces on slabs not nearly deep enough to make a full 3-D figure, so I thought “Why not?” For source material, I took pictures of a back up singer on a TV show. Although she isn't famous, I didn't attempt to closely capture her likeness, only her expression as she repeatedly belted out the word “rise” each time the song reached the chorus.


With a slight turn of her head to the right, she worked best in our house in a spot where that turn would make her face toward the middle of the room.


Saturday, May 6, 2017

The Discussion or Paper Cutting My Way to a Successful Painting

 
The Discussion 
8x10 inches acrylic on stretched canvas
  
This post is some more about my current fav “sketching” technique. I wanted to do a little painting sketch, on a small 8x10 inch stretched canvas. My primary technique goal was to paint the figures very broadly and try not to return to my habitual detailing, detailing...detailing. Now stretched canvas is VERY springy.....in other words if you tried to trace off a pencil sketch.....it bounces with every lick of the pencil. Besides canvas weave is also very bumpy.....the canvas texture is very visible.
So......I took the long way 'round.....I traced my sketch onto a piece of heavy tracing paper, and cut out the figures. I taped the cutout paper over my canvas and brushed on the very green grass.


This let me get a good clear outline of the silhouettes of the three figures and let me paint in the cool dark colours of the background without worrying about dashing paint over into the facial areas.

 
It also let me work confidently on getting the intense color of the green grass with the warmer grass colour along the center line of the painting closest to the main area of interest.....the head and shoulders of the talking figures. And concentrate on getting the background crowd dark and greyed enough to be a perfect backdrop for the central foreground figures.
I was following a bitty scribble chart noting that I wanted a cool background to transition to a warm foreground. I wanted my two contrast points of interest to be on the two groupings of the three figures. Everything else was going to be muted, and less distinct to leave the focus of the painting to be the three figures having their discussion.


Here you can see my strategy for painting the facial features....without painting lines and too much details for the very small space. At this size things were a bit fiddly, but it worked. I also adapted the practice of having three brushes going at the same time.....one with a light flesh tone, one with a mid tone and a third with a very dark tone. I just painted in the mass tones of the faces.....and let it dry.

 
I took the “finding marks” of the shadow masses and went off painting, using them as my guide for facial feature placement. I wasn't satisfied with my pencil sketch's features or hair or in one case, arm placement. All easily worked on and changed as I painted.

 
Here you can see where I painted in the right hand man's boots. I used teensy tiny scissors, cut out his boots, placed the stencil over the correct spot, and painted in the boot outline. After removing the stencil, I painted in more light and shadows to make the boots look like....boots!

This painting has been a blast to do.....and as always....I learned a lot!