
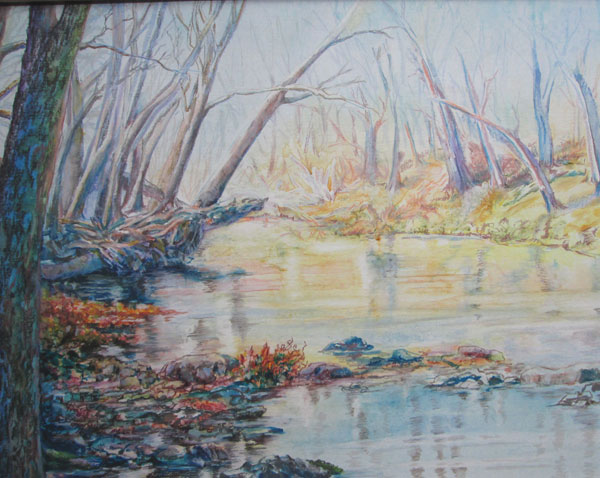
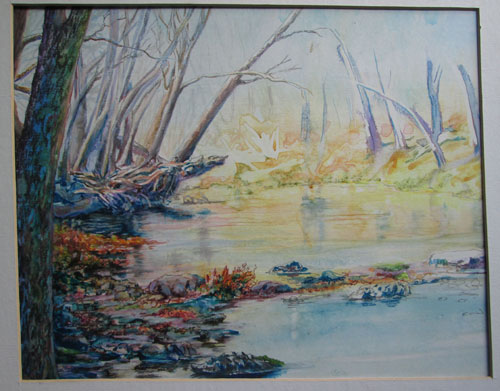
CREEKSCAPE
16 x 20
colored pencil over watercolour
various
brands of watercolours
various
brands of coloured pencils (mostly Prismas and Polys)
Done on
HiLine smooth illustration board
Photo by
Frank Lyne, and used with his permission and approval
This
time around I'm mixing watercolours with colored pencils.
A while
back, I was looking thru my UFO (UnFinished Objects) file, and came
across this half way done watercolour sketch. I'd used a lovely
photo that Frank had taken when he did a creek walk. My intent at
the time was to use watercolours in a very hi key colour way for the
underpainting, and possibly glaze over with darker colours to mute,
but not hide, the bright colours. The only thing was, I'd used hot
press illustration board (a thick paper surfaced with a slick
coating) that kept the watercolours very “on the surface”. That
coating didn't allow the watercolours to sink in as they would on
regular watercolour paper. The watercolours threatened to wash right
off when I tried to apply a second set of washes. So I laid this
sketch back and forgot about it.
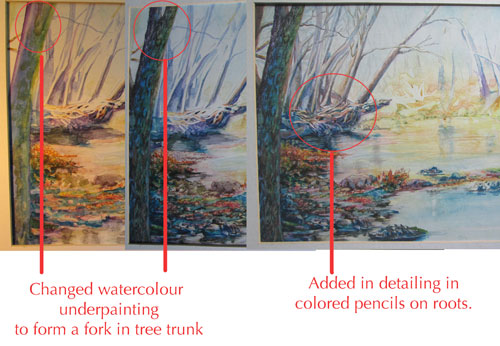
Recently
I decided to “pick up” this watercolour sketch again, and see
what would happen if I went over the “on the surface”
watercolours with wax coloured pencils. My normal progression in
coloured pencils is to go from left to right, keeping my right (and
pencil) hand on waste paper to protect the watercolour washes already
laid down. I penciled in some dark and more intense colours on the
left hand tree trunk and foreground rocks and leaves. It looked
OK......but the tree was a bit thick towards the top. I decided that
I needed a fork in the tree top. Putting white colored pencil over
the dark coloured watercolour (to form a fork in the top of the
trunk) didn't seem like the best solution.....so I instead took a
moist acrylic brush (slightly stiffer bristles than a watercolor
one....but not too much!), and lightly went over the watercolour of
the tree trunk. Lo and behold......the watercolour that was resting
on the surface of the paper lifted right off.....and didn't leave a
residue. I could then put in a bit of sky colour and voila! I had a
fork in the tree.
You can
see here the differences just a little water erasing and coloured
pencil detailing can make. I went on to work on some of the mid
ground trees,rocks and reflections. I could use the lovely detailing
in the mid ground roots/branches but still keep it “mid ground”
by detailing with greyed and muted colours. If a bit of watercolour
got “in the way” of where I needed a tree branch.....all I had to
do was wipe it off with a bit of water. Almost as good as the erase
button on a computer!
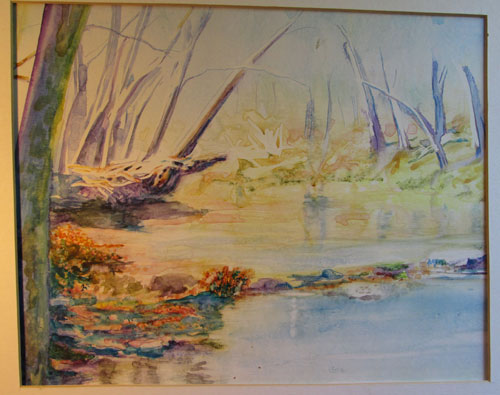
As I
progressed across the page, I decided that tho' I'd followed Frank's
source photo, the foreground rocks were not exactly in the best
composition for my framing. This is the point in every artwork,
where the “needs of the artwork, over rule the original source
image”. I changed the foreground rocks crossing the creek from a
straight line, to a slight bow shape that echoed the far creek shore
line. Again, it was quite easy to do, due to the slick surface.
Just a bit-o-water and the watercolour rocks vanished, to be replaced
with rocks just where they were needed.
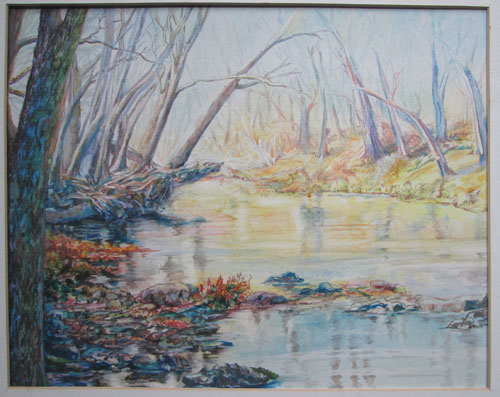
I
continued on detailing in coloured pencils till I was ready to “call
it done”.
Wonderful Alison... thanks for the sharing of your process. This is simply so lovely. The reflections, the details and the fluid waters.
ReplyDeleteHi Ginger. That's high praise indeed, from someone who did a whole book about the water luving elephant, Gunther! Thanks SO much.
ReplyDelete